Category Archives: Recipes

Low Carb Zucchini Fries

Low Carb Zucchini Fries RecipeI consider zucchini to be the “Swiss Army Knife” of summer vegetables since there are so many different ways to prepare it – both as a main course as well as a side dish. Though fresh zucchinis can be had year round in most locales, it’s at its best during the summer months. I’m a big believer in the strategy of consuming fruits and vegetables when they’re in season. Zucchini also are easy to grow in backyard gardens provided you have sufficient space to let the vines roam. The following recipe is just one of many ways to prepare a healthy and tasty side dish using zucchini.


Though this recipe won’t make you forget McDonald’s fries, it will hopefully begin to gently lead you towards a path of choosing healthier and lower carb side dishes. There are quite a few recipes out there for zucchini fries, but I’ve found them to still be a little too heavy on the starchy carbs for my liking. Most use flour and breadcrumbs to provide a crispy coating to the fries. This is great, but through a little experimenting, I’ve managed to come up with something just as good that doesn’t add to the glycemic load of the recipe and is also much simpler to prepare since it eliminates a few extra steps. The other recipes require that you first dredge the zucchini strips in flour and then dunk them into egg before another dredging operation into breadcrumbs. We’re gonna skip all that and get right into cooking up some zucchini fries!

It’s Officially Zucchini Season 2015!

With zucchini’s popping out in gardens all over now that it’s summer, why not take advantage of all the great ways to enjoy them? Besides this fantastic low-carb baked zucchini fries recipe, there’s also zoodles. In the video below, I demonstrate how to use a simple Vegetti slicer to make oodles of zoodles! It also includes a delicious recipe for combining them with a low-carb version of Chicken Parmesan.

These fries can either be served as a side dish or can also be served on their own as an appetizer. Hold the ketchup and serve them with a dip of hot marinara sauce or cold homemade salsa. Bring these out to your friends during your next Super Bowl party and see how they react.

Servings: 2

low carb zucchini fries nutrition info

Ingredients:

  • 1 medium size zucchini
  • ½ C Parmesan cheese
  • 3 Tbsp Extra virgin olive oil
  • ½ tsp Salt
  • ½ tsp Ground pepper

Directions:

  1. Preheat oven to 350F
  2. Peel the zucchini with a potato peeler and cut into strips ¼” thick and about 3” long
  3. Pour 2 Tbsp of olive oil into a glass baking dish and dump the “fries” into it. Lightly toss the fries until well-coated with olive oil.

    Sliced Zucchini Fries

  4. Dump Parmesan cheese, salt, and pepper onto a plate and sift together using a fork.
  5. Place several fries at a time into the Parmesan cheese mixture. Roll the zucchini strips over several times in the mixture making sure that they are thoroughly coated on both sides with cheese.
  6. Place the zucchini strips in uniform rows on the cookie sheet. You don’t need much spacing between them, but you may need a second cookie sheet depending on how many fries you wound up with.
    Baked Zucchini Fries
  7. Sprinkle the remaining olive oil using a metal soup spoon evenly over the tops of the fries.
  8. Bake the fries for 10 minutes and then remove from the oven. Carefully flip them over using a spatula and then place back into the oven for another 10 minutes or until well-browned.
  9. Remove fries from oven and server immediately – either as a side dish or as an appetizer with one of the aforementioned dipping sauces.

Checkout More of Our Delicious Low Carb Recipes Here!

Low Carb One Minute Cheesecake

low carb one minute cheesecakeIn the lowcarber’s on-going quest to find low-carb versions of traditional dishes from the high-carb world, there exist the ones from the pastry world. I won’t bother to enumerate any of them here. The list is legion and I’m sure you just rattled off at least a dozen in your head while reading the previous sentences. It’s a world you’re better off leaving completely behind. But if you insist on going there, then you need to be aware of the preparation challenges with adapting these temptations to your way of eating.

The crux of the problem with pastries of most kinds is twofold and comes down to finding suitable substitutions for two major ingredients: flour and sugar. Without these key ingredients why even bother? Cauliflower double-fudge brownies anyone?

The essential challenges are finding substitutes for refined white flour and that sweetest of all ingredients: sugar. There are nut flours you can choose from and coconut flour isn’t a bad one. It tastes like coconut and is sort of sweet and you can always use baking powder and/or tapioca flour for low-carb forms of leavening. Where the typical sugar substitutes fall short when it comes to baking is lack of caramelizing properties at least for most of them. But what if there was a sweet treat that just about everyone craves that doesn’t use flour and can do just fine without caramelization?

If I had obscured the delicacy in question in the title of this post, I bet it would have taken you a while to come up with it, unless of course you’re a cheesecake fanatic. After all what is cheesecake, besides a big ole hunk of cream cheese, combined with eggs and a ton of sugar? Baking a cheese cake is typically a rather involved, time-consuming process. My Aunt Mary’s “Light as air fluffy cheese cake” is a rather big production, but oh so worth it. I’m providing the link to the recipe on her blog for information purposes only. You’ve been warned! Oh, and be sure to watch the video she recorded.

I found this microwave version of a single-serving cheese cake on Facebook. I’ve adapted it to replace the sugar with a few drops of liquid stevia. When it comes to cooking and dressings, substituting Swanson Vitamins’ liquid stevia will make you swear that real sugar was used. I lied in the title. Actual preparation time is somewhat under five minutes with a cooking time of ninety seconds. And of course you need to let it chill in the fridge for a few hours prior to eating. That’s a true test of your willpower!

Note-1: This recipe doesn’t use a crust. As you probably know, most cheesecakes have a streusel type crust made from either crushed graham crackers or bread crumbs. It also uses quite a bit of sugar along with butter. Honestly, I don’t really miss the crust. I was thinking about making a faux crust using almond flour, but I think the crunchy granularity of the sugar would be missed in this case.

Note-2: Portion control tip. I’ve mustered the discipline to consume exactly half a mini cheesecake per sitting. My typical routine – when I have some on hand – is to eat half with my afternoon coffee (great combo!), and then finish the remaining half as dessert after dinner or as an evening snack. It sounds really hard, but it’s a great way to manage both appetite and cravings.

cheesecake-label

Ingredients:

low-carb cheesecake ingredients

  • 2 oz cream cheese softened
  • 2 Tbsp sour cream
  • 1/4 tsp organic vanilla extract
  • 1/2 tsp lemon juice
  • 6-8 drops liquid stevia
  • Small ramekin for “baking”

Directions:

  1. Place cream cheese in a microwave-safe bowl and soften (about 20-30s on High).
    softened cream cheese
  2. Add remaining ingredients and whisk together.
    low-carb cheesecake batter
  3. Pour batter into small ramekin and microwave on High for 90s. Stir gently after 30s. Recheck at 60s and only stir if still soupy.
    one minute microwave cheesecake
  4. Chill in fridge for at least one hour.
  5. (Optional) top with fresh strawberries, raspberries, or blueberries or if you’re feeling really decadent; sugar-free jam.

Homemade Salad Dressing Recipes

Homemade Salad Dressings
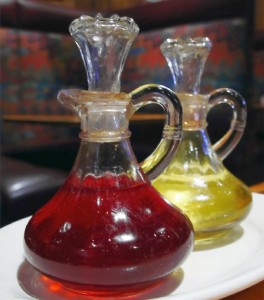
A staple of any diet, low carb or otherwise, is salads. Sometimes you do find yourself feeling like that proverbial rabbit from noshing on all that lettuce and the only saving grace is all the salad dressing you can drench it in to mask the fact that you’re essentially eating roughage.

Once upon a time, back in the days when low fat diets were the law of the land, it was about finding the lowest fat versions of salad dressings. Fast forward a decade or two, and it’s now all about finding salad dressings with next to zero carbs. In this quest, we allow in a lot of unhealthy stuff in the form of vegetable and seed oils, sodium, and a laundry list of preservatives. That’s if you’re going the convenient route and purchasing bottled salad dressings.

A question that gets asked quite a bit in online low-carb groups is what are good salad dressings to use when eating low-carb. It’s important that they have as few carbs as possible to those asking these questions. Taste seems to often be a secondary concern.

When I see these types of questions it causes me to wonder if these people have ever considered making their own salad dressings. It’s a very simple matter to whip up a healthy and tasty salad dressing at home and most require only two basic ingredients: oil and vinegar.

The oil part can consist of EVOO, avocado oil, yogurt, or mayo. There are even more options for the acid portion of the dressing when you consider that there is more than one type of vinegar as well as lemon and lime juice.

The possibilities really begin to open up when it comes to the host of spices that can be incorporated into a dressing. And if you want REALLY simple then take a cue from the lead photo of this post and take a page from the Mediterranean Diet and pour EVOO and red wine vinegar directly from the bottles (or cruets if you’re being fancy). Sprinkle some dried oregano over it and voila!

In the video below I demonstrate how to make two very basic salad dressings: a basic balsamic vinaigrette and my interpretation of honey mustard with a low-carb twist. Enjoy!

Photo Credits (morguefile.com):

  • Oil and Vinegar cruets: deegolden

Low Carb Bread That Doesn’t Suck

low carb cheesey bread
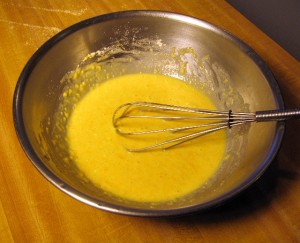
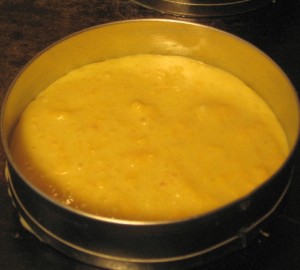
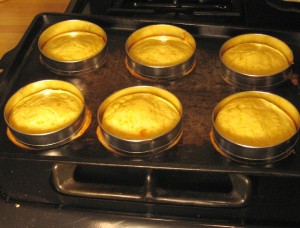
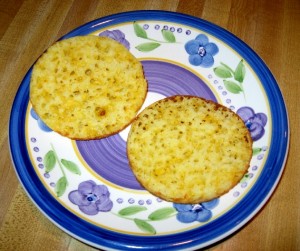
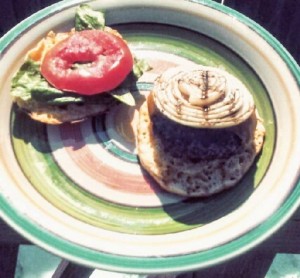
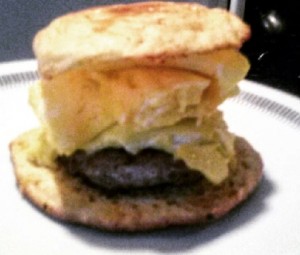
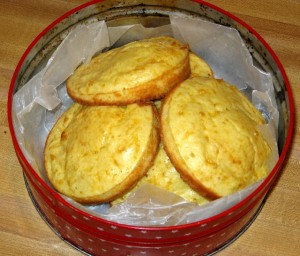
One of the first things that gets thrown out when starting to eat low carb is bread—bread of all kinds: sliced bread, dinner rolls, sub rolls (hoagie rolls in Philly), Kaiser rolls, English muffins, and biscuits (oh, no, not the biscuits!)

Wasn’t it bad enough that the pasta and rice also got banished and don’t get me started on the pizza! I think just about everyone who has begun a low-carb diet has eventually begun the search for the Holy Grail soon after starting and I’m not talking about the grail from Raiders of the Lost Ark.

It’s the search for substitutes for the great-tasting, carb-laden foods that most of us continue to crave after giving them up. It’s these cravings that never seem to subside and are often the ruin of many a low-carb diet despite the best of intentions (cue House of the New Rising Sun). The low-carb, and even gluten-free versions of these items, especially bread, almost always leave you disappointed. The ingredients in a lot of these breads run the gamut from nut and seed flours such as almond, coconut, and flaxseed to even chia seeds. I think I’d only want chia seeds on my retro Chia Pets and even that’s a stretch.

I’ve never tried any of the commercially available low-carb breads and really have no desire to at this point. The outrageous prices of most are more than enough to ward me off and if they turn out to taste like, well, flaxseed, then I’m really going to feel dumb. The homemade versions, though commendable for the attempt, often involve way too many ingredients and steps. And judging from the flour substitutes, it doesn’t look like something I’d want to attempt baking. I could be wrong, but instead, wondered if I could perform a “food makeover” that involved a “nutritional compromise.” It’s a fairly large one at first glance after you learn what one of the ingredients is.

My Challenge: would it be possible to make a dilute version of a high-carb, highly-refined food item such as a biscuit or roll that would taste very close to the full-on version, but be compatible with my way of eating while not incurring too much of a unhealthy dose of things like trans-fat, sugar, and refined white flour?

Bisquick box

It’s an outrage I tell, ya!

I began by studying a lot of the low-carb and gluten-free bread and biscuit recipes. A version that caught my eye used eggs and cheddar cheese as the foundation for the “dough.” Batter would be a more apt description. It also employed baking powder and a few other ingredients to give it a bread-like quality when baked. It then occurred to me that I could leverage Bisquick for both its leavening as well as its gluten content. Yes, sorry, this recipe is far from gluten-free, so my apologies to readers with celiac disease or are otherwise gluten-sensitive. I was just thinking about myself on this one.

The resulting recipe so far has met my needs perfectly. I use a half-and-half mixture of Bisquick and almond flour and the net carbs work out to 6g per roll/biscuit/muffin—however you’d like to call them. The trans-fat is less than 1g which qualifies for 0g with respect to nutritional labeling requirements for commercial food products. Now, I certainly understand that this sort of thing qualifies as low-carb, Paleo, etc. sacrilege and you’re free to skip this one. But you’ll never know what you’re missing!

low carb bread ingredients

Ingredients:

  • 1/3 cup Bisquick (oh noooos!!)
  • 1/3 cup almond flour
  • 2 large eggs
  • 3 Tsbp whole milk
  • 1 cup shredded cheddar cheese (I use extra sharp New York style)

Servings: 6

low carb bread nutritional label

Utensils:

  • 6 English muffin rings
  • 1 non-stick baking pan
  • 1 large mixing bowl

Directions:

  1. Grease English muffin tins with coconut oil or butter – don’t use Pam! Arrange evenly on non-stick baking pan.
    English muffin rings
  2. Add Bisquick, almond flour, cheese, eggs, and milk to large mixing bowl and whisk. Should be the consistency of thick pancake batter.
    low carb bread batter
  3. Pour or spoon about 1/4 cup of batter into each muffin ring. This will be well short of the top of the ring, but the bread will rise during baking. This does make for a pretty thin roll, so can use more if cutting quantity back to 5 or 4 rings. Bear in mind that this ups the carbs and all other nutrients proportionally. Don’t worry if some of the batter seeps out under the rings. It shouldn’t be much.

    low carb bread batter poured into muffin ring

    Batter only comes up part way in ring

  4. Bake at 400F for 12 minutes.
  5. Remove baking pan from oven and let cool. Carefully release rolls by scoring around the inside of the ring with a butter knife.

    baked low carb rolls from oven

    Some battered leaked out – no biggie, simply trim!

  6. Allow to thoroughly cool before slicing. Store in cookie tin or plastic container. Since these don’t have extra preservatives, they won’t keep long unrefrigerated. I leave them out for about 3 days before refrigerating.

I use these rolls in various ways:

  • Have half a toasted roll with breakfast (the heated cheddar smells great!). The natural nooks and crannies (thanks to the eggs, cheese, and of course Bisquick) resemble actual English muffins.
    low carb toast
  • Use for sandwiches. A turkey and cheese pictured below simulates a club sandwich.
    turkey club on low carb roll
  • Use when I feel like having a “real” hamburger.
    cheese burger on low carb roll
  • Makes a killer sausage/ham, egg, and cheese biscuit a la Hardee’s!
    sausage, egg, and cheese on low carb biscuit

The important thing to note is I don’t make these all the time. They are just a part of my “carb rotation” now that I’m working more carbs back into my diet. And since they involve a bit more work, it’s something that naturally limits consumption.

A note about toasting: I like to toast a roll especially when making a turkey club, but just be aware that due to their thinness and cheese content, that they tend to curl up at the edges. Therefore, set your toaster lower than you normally would for regular bread and don’t freak out if they still curl up a bit. If you’re really careful, you can “smooth” the curls down a bit.

Chicken Alfredo Without The Guilt

low-carb chicken alfredo recipe 
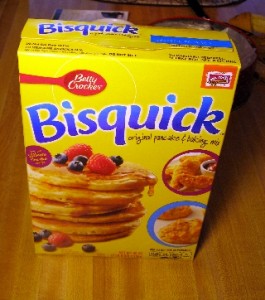
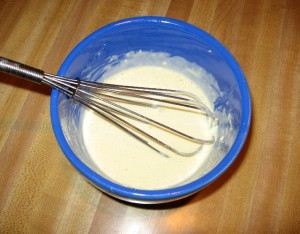
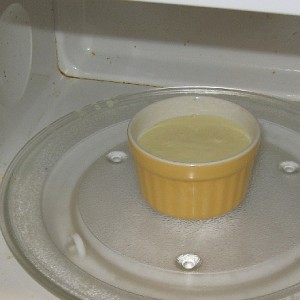
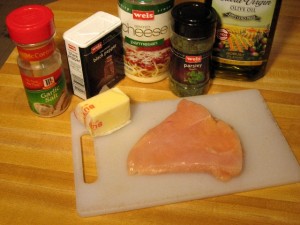
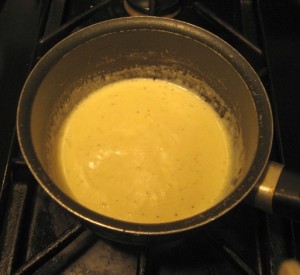
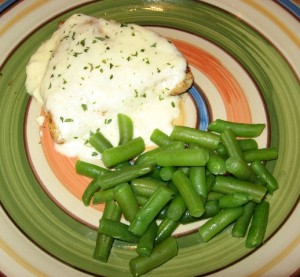
Alfredo sauce is one of those decadent delights that we’ve been conditioned to regard as extremely rich and fattening. We’ve been told that a single exposure to it will surely lead us down the path to an early death courtesy of a heart attack that we so richly deserve. At least the first part of that belief is still true (it’s extremely rich). The rest has been proven to be pure baloney.

If you eat poultry, then you’re pretty much on Easy Street when it comes to eating low-carb. There are so many ways to prepare chicken that you could probably go for an entire year without repeating any of them. If you think I’m exaggerating, then punch “chicken recipes” into Google and let ‘er rip. It seems that just about every nationality and ethnic group has a chicken recipe they’re known for, with the exception of possibly the Inuit and Kalahari Bush People, but they have their own delicious forms of cuisine. What’s great about chicken and low-carb is that if an existing recipe isn’t already low-carb friendly then it can usually be adapted so that it is.

When you think of Alfredo the first thing that probably comes to mind is Fettuccine Alfredo. Now this definitely isn’t low-carb and it’s an unhealthy combination of starchy carbs and saturated fat. But when we divorce it from its long-term pasta pairing, things really open up in terms of low-carb possibilities. What is also great about Alfredo sauce is that it doesn’t require an additional thickener such as flour or corn starch. The heavy cream and loads of Parmesan cheese handle all that on their own… what’s not to like and best of all, no guilt (unless you want it)!

Servings: 2

low-carb chicken alfredo nutritional info

Ingredients:

low-carb chicken alfredo ingredients

  • 2 boneless, skinless chicken breasts (4oz each). Pound or cut in half so relatively thin.
  • 3 Tbsp unsalted butter
  • 1 Tbsp EVOO
  • 1/4tsp garlic salt
  • 1/4tsp ground black pepper
  • 1/4c heavy whipping cream
  • 1/2c grated Parmesan cheese
  • 1/2tsp dried parsley flakes (optional)

Directions:

low-carb alfredo sauce recipe

  1. Season chicken breasts with garlic salt and black pepper.
  2. Heat 1Tbsp butter and 1Tbsp EVOO in a skillet.
  3. Sautee chicken breasts until brown on both sides and cooked through. About 4-5 mins per side. Remove when done to serving plate.
  4. Melt 2Tbsp butter in a small sauce pan.
  5. Add heavy cream to pan and lower heat.
  6. Gradually add grated Parmesan to sauce while stirring. Bring to just below a boil. Don’t overheat. Sprinkle black pepper into Alfredo sauce and stir.
  7. Pour Alfredo sauce over chicken breasts and sprinkle dried parsley on top.

The really great thing about Alfredo sauce is that you can pour it over just about anything, including beef, fish, and veggies. It did wonders for those cut green beans in the photo at the top of this post!

All Natural Sugar Free Hot Cocoa

low carb hot cocoa for wintertime
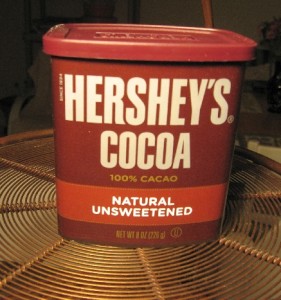
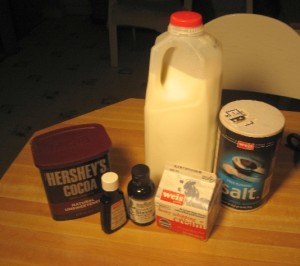
It’s been a cold winter so far here in the Northeast, US. The other day the outdoor thermometer read a whopping 3F! And that’s without the wind chill factor. Of course, my brother Rob calls me a lightweight when I complain about the cold. He’s been seeing -14F with a wind chill of -40F out in Fargo, ND. Either way you slice it, cold is cold and cold weather and I don’t get along very well. That’s why this time of year I get nostalgic for hot cocoa.

It’s one of the ultimate comfort foods and something that brings those memories of being a kid rushing back. Who doesn’t remember coming home to a piping hot cup of hot chocolate after a long day of sledding and playing in the snow? The only problem is good luck finding a hot chocolate mix that isn’t loaded with extra sugar or a “sugar-free” version that isn’t a cloying mixture of artificial ingredients. Yuck!

I had been thinking for a while to experiment with natural cocoa powder and the opportunity arose recently when I tried out an incredible low-carb fudge recipe that Lynn Terry posted on her Traveling Low Carb blog. She has two recipes: one for chocolate and peanut butter fudge and one for all peanut butter. They’re both based on healthy coconut oil. She posted a great variation using heart-shaped molds to make Valentine’s candies. Clever and delicious! I then got motivated and decided to try the chocolate and peanut combo fudge so I picked up a can of Hershey’s Natural Unsweetened Cocoa.

hershey's all natural cocoa powder

Um, bitter!

The first thing you discover with this stuff is it’s bitter. Not semi-sweet, dark chocolate bitter, which I love, but nose-crinkling, mouth puckering bitter! It almost seems like there’s not enough sugar in the world to make this stuff palatable. Fortunately, liquid stevia once again came to my rescue and made everything all nice and sweet and perfect!

There’s a recipe on the side of the Hershey’s can for “Favorite Hot Cocoa.” I modified it for a single cup—the recipe on the can makes four servings. I also replaced the sugar with sufficient liquid stevia and used some heavy whipping cream for some added richness and a silkier texture. The addition of heavy cream is essentially topping the finished product with a dollop of whipped cream, but for those too lazy (me) to make whipped cream. Whipped cream actually reverts back into cream form when it dissolves in the hot liquid, so no fuss, no muss! If you don’t have cream on hand, then just replace it with more milk.

It took me a few tries to get the measurements just right. If you look at the recipe as a two-step process, then things come into focus. The first step is to make a thick chocolate sauce. This then forms the base for the milk portion. It’s really very similar to making hot chocolate using Nestlé’s or Hershey’s chocolate syrup. Hot chocolate makes for a great snack in place of coffee or tea as well as a very satisfying and filling dessert. Just go easy on the mini marshmallows if you got ‘em!

Serving Size: 10 oz

low-carb hot cocoa nutritional label

Ingredients:

low-carb hot cocoa ingredients

Yep, salt. Helps cut the bitterness.


  • ¼ c water
  • 1 Tbsp Hershey’s Natural Unsweetened Cocoa Powder
  • ½ tsp vanilla extract
  • Dash tsp salt
  • 2 Tbsp heavy whipping cream
  • ¾ c whole milk
  • 4-8 drops liquid stevia

Directions:

  1. In a small sauce pan, bring water to a boil.
  2. Stir in cocoa powder with a wooden spoon. Mix well until powder is completely dissolved. Should form a thick chocolate syrup.
  3. Lower heat and add salt and vanilla extract. Stir.
  4. Add heavy whipping cream.
  5. Gradually add milk while stirring. Raise heat slightly to just below a boil. Be careful not to scald the milk.
  6. When thoroughly hot, pour into a coffee mug. You may want to use a teaspoon to mix in any remaining syrup at bottom of mug while drinking.
low-carb hot cocoa serving suggestion

Serve hot – pug mug optional!